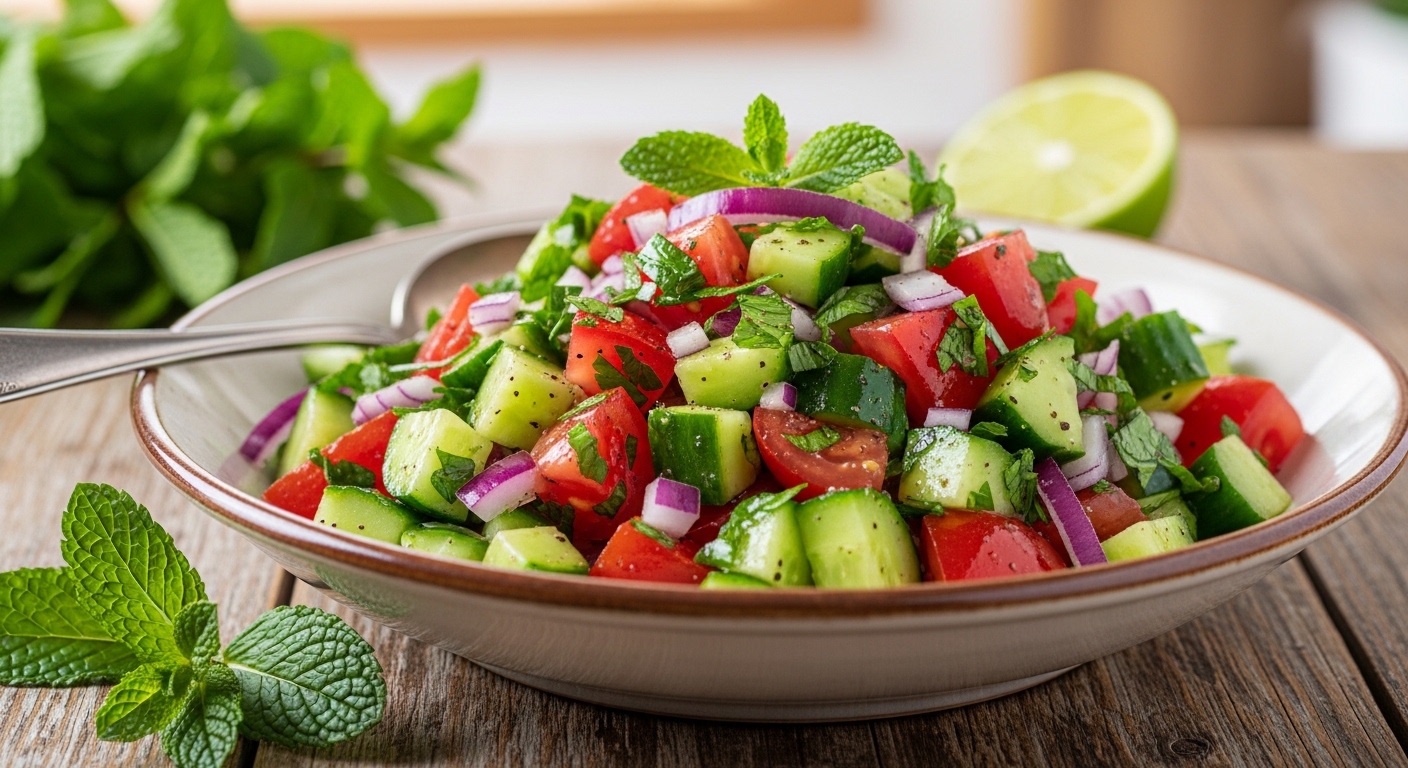
Persian Shirazi Salad (Fresh, Crisp & Refreshing)
Light, vibrant, and incredibly refreshing, Persian Shirazi Salad is a classic Middle Eastern dish known for its simple ingredients and bold flavor. Made with finely chopped cucumbers, tomatoes, and onions, then tossed in a bright lime dressing, this salad is the perfect side dish for grilled meats, rice meals, or summer dinners.
Best of all, it takes only minutes to prepare and adds a healthy touch to any table.
Table of Contents
-
What Is Persian Shirazi Salad?
-
Ingredients
-
Instructions
-
Tips for Success
-
Advantages
-
Disadvantages
-
FAQs
-
Conclusion
What Is Persian Shirazi Salad?
Shirazi Salad originates from Shiraz, Iran, and is a staple in Persian cuisine. It is known for its finely diced vegetables and tangy citrus dressing, which creates a clean and refreshing flavor.
Traditionally served alongside kebabs and rice dishes, this salad is appreciated for balancing heavier meals with its crisp texture and acidity.
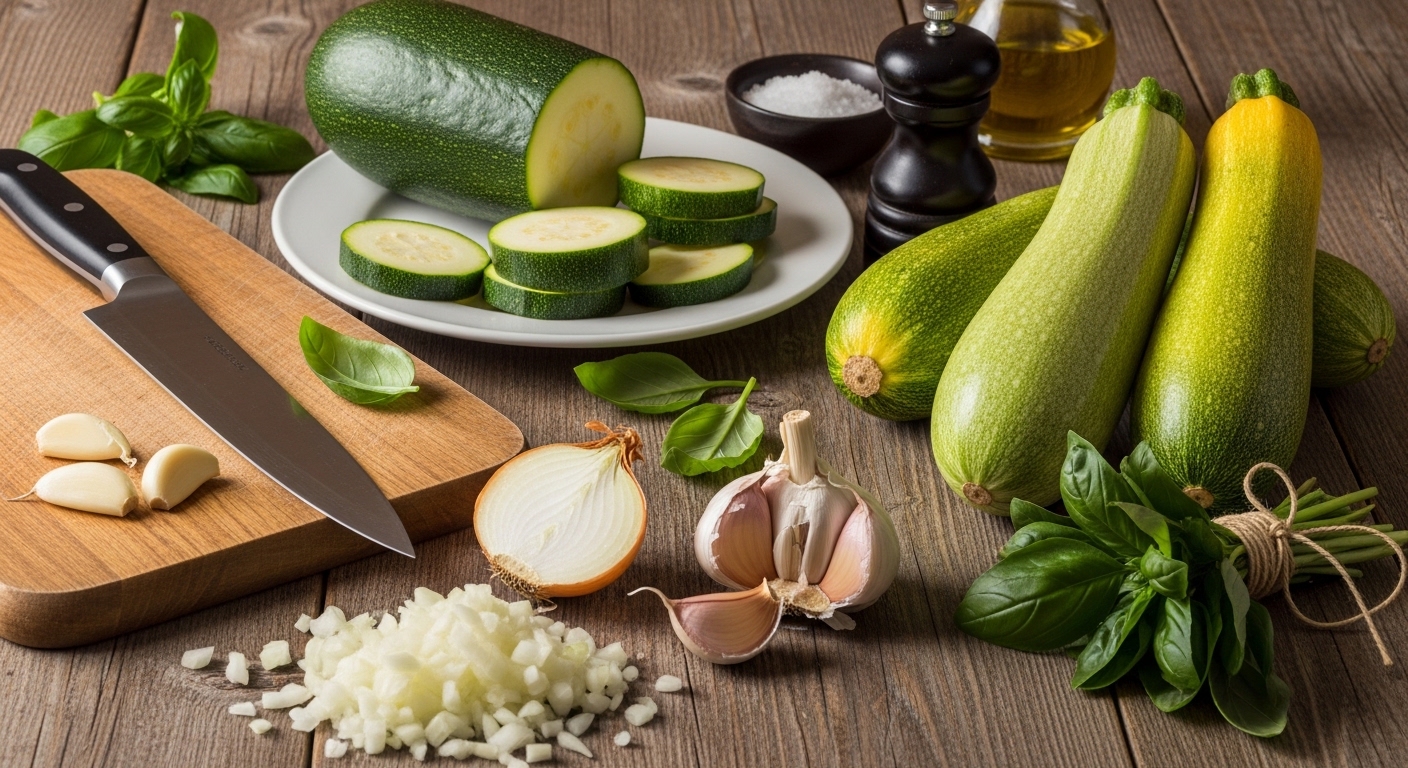
Ingredients
Main Ingredients:
-
2 cups Persian cucumbers (or any seedless cucumbers), finely diced
-
2 medium ripe tomatoes, finely chopped
-
½ small red onion, finely diced
-
3 tablespoons fresh lime juice (or lemon juice)
-
2 tablespoons extra virgin olive oil
-
1 tablespoon dried mint (or 2 tablespoons fresh mint)
-
Salt, to taste
-
Black pepper, to taste
Optional Add-Ons:
-
Chopped parsley for extra freshness
-
A pinch of sumac for authentic Persian flavor
-
Diced bell peppers for added crunch
Instructions
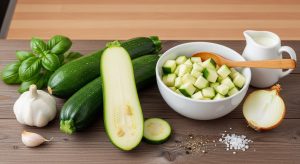
Step 1: Chop the Vegetables
Finely dice the cucumbers, tomatoes, and onion into small, even pieces. Uniform chopping helps distribute flavor evenly in every bite.
Step 2: Make the Dressing
In a small bowl, whisk together lime juice, olive oil, dried mint, salt, and black pepper until well combined.
Step 3: Combine Everything
Place the chopped vegetables in a large mixing bowl. Pour the dressing over them and toss gently to coat.
Step 4: Let It Rest
Allow the salad to sit for about 10–15 minutes before serving. This helps the vegetables absorb the dressing and enhances the flavor.
Step 5: Serve Fresh
Serve chilled or at room temperature for the best taste and texture.
Tips for Success
✅ Use firm, fresh cucumbers to keep the salad crunchy.
✅ Remove excess tomato seeds if the salad becomes watery.
✅ Chop ingredients finely — this is key to authentic Shirazi texture.
✅ Adjust lime or lemon juice based on your preferred level of tanginess.
✅ Chill briefly before serving for a more refreshing experience.
Advantages
✔ Extremely quick and easy to prepare
✔ Naturally healthy and low in calories
✔ Vegan and gluten-free
✔ Perfect for hot weather
✔ Pairs well with many main dishes
Disadvantages
❌ Best eaten fresh; it can become watery if stored too long.
❌ Strong onion flavor may not suit everyone.
❌ Requires precise chopping for the ideal texture.
FAQs
Can I make Shirazi salad ahead of time?
You can prepare it a few hours in advance, but for maximum freshness, it’s best served the same day.
What makes this salad authentic?
Finely chopped vegetables, dried mint, and a citrus-based dressing are key elements of traditional Shirazi salad.
Can I use regular cucumbers?
Yes, but consider removing large seeds to prevent extra moisture.
Is this salad healthy?
Absolutely! It’s packed with vitamins, hydrating vegetables, and heart-healthy olive oil.
Conclusion
Persian Shirazi Salad is proof that simple ingredients can create unforgettable flavor. Crisp vegetables, zesty citrus, and aromatic mint come together in a dish that is both refreshing and nutritious.
Whether served with grilled meats, rice, or enjoyed on its own, this classic Persian salad is a timeless recipe you’ll return to again and again.
Persian Shirazi Salad (Fresh, Crisp & Refreshing)
Light, vibrant, and incredibly refreshing, Persian Shirazi Salad is a classic Middle Eastern dish known for its simple ingredients and bold flavor. Made with finely chopped cucumbers, tomatoes, and onions, then tossed in a bright lime dressing, this salad is the perfect side dish for grilled meats, rice meals, or summer dinners.
Best of all, it takes only minutes to prepare and adds a healthy touch to any table.
Table of Contents
-
What Is Persian Shirazi Salad?
-
Ingredients
-
Instructions
-
Tips for Success
-
Advantages
-
Disadvantages
-
FAQs
-
Conclusion
What Is Persian Shirazi Salad?
Shirazi Salad originates from Shiraz, Iran, and is a staple in Persian cuisine. It is known for its finely diced vegetables and tangy citrus dressing, which creates a clean and refreshing flavor.
Traditionally served alongside kebabs and rice dishes, this salad is appreciated for balancing heavier meals with its crisp texture and acidity.

Ingredients
Main Ingredients:
-
2 cups Persian cucumbers (or any seedless cucumbers), finely diced
-
2 medium ripe tomatoes, finely chopped
-
½ small red onion, finely diced
-
3 tablespoons fresh lime juice (or lemon juice)
-
2 tablespoons extra virgin olive oil
-
1 tablespoon dried mint (or 2 tablespoons fresh mint)
-
Salt, to taste
-
Black pepper, to taste
Optional Add-Ons:
-
Chopped parsley for extra freshness
-
A pinch of sumac for authentic Persian flavor
-
Diced bell peppers for added crunch
Instructions
Step 1: Chop the Vegetables
Finely dice the cucumbers, tomatoes, and onion into small, even pieces. Uniform chopping helps distribute flavor evenly in every bite.
Step 2: Make the Dressing
In a small bowl, whisk together lime juice, olive oil, dried mint, salt, and black pepper until well combined.
Step 3: Combine Everything
Place the chopped vegetables in a large mixing bowl. Pour the dressing over them and toss gently to coat.
Step 4: Let It Rest
Allow the salad to sit for about 10–15 minutes before serving. This helps the vegetables absorb the dressing and enhances the flavor.
Step 5: Serve Fresh
Serve chilled or at room temperature for the best taste and texture.
Tips for Success
✅ Use firm, fresh cucumbers to keep the salad crunchy.
✅ Remove excess tomato seeds if the salad becomes watery.
✅ Chop ingredients finely — this is key to authentic Shirazi texture.
✅ Adjust lime or lemon juice based on your preferred level of tanginess.
✅ Chill briefly before serving for a more refreshing experience.
Advantages
✔ Extremely quick and easy to prepare
✔ Naturally healthy and low in calories
✔ Vegan and gluten-free
✔ Perfect for hot weather
✔ Pairs well with many main dishes
Disadvantages
❌ Best eaten fresh; it can become watery if stored too long.
❌ Strong onion flavor may not suit everyone.
❌ Requires precise chopping for the ideal texture.
FAQs
Can I make Shirazi salad ahead of time?
You can prepare it a few hours in advance, but for maximum freshness, it’s best served the same day.
What makes this salad authentic?
Finely chopped vegetables, dried mint, and a citrus-based dressing are key elements of traditional Shirazi salad.
Can I use regular cucumbers?
Yes, but consider removing large seeds to prevent extra moisture.
Is this salad healthy?
Absolutely! It’s packed with vitamins, hydrating vegetables, and heart-healthy olive oil.
Conclusion
Persian Shirazi Salad is proof that simple ingredients can create unforgettable flavor. Crisp vegetables, zesty citrus, and aromatic mint come together in a dish that is both refreshing and nutritious.
Whether served with grilled meats, rice, or enjoyed on its own, this classic Persian salad is a timeless recipe you’ll return to again and again.

Simple Chocolate Pudding (Rich, Creamy & Easy Dessert)
If you’re craving a smooth, chocolatey dessert that comes together quickly, this Simple Chocolate Pudding is the perfect recipe. Made with basic pantry ingredients, it delivers a rich flavor and silky texture without requiring complicated techniques.
Perfect for family dinners, parties, or late-night sweet cravings, this homemade pudding tastes far better than store-bought versions.
Table of Contents
-
What Is Chocolate Pudding?
-
Ingredients
-
Instructions
-
Tips for Success
-
Advantages
-
Disadvantages
-
FAQs
-
Conclusion
What Is Chocolate Pudding?
Chocolate pudding is a creamy dessert made by cooking milk, sugar, and cocoa with a thickening agent like cornstarch. The mixture is heated until it becomes smooth and velvety, then chilled to create a luscious texture loved by both kids and adults.
Unlike chocolate mousse, pudding is denser and more comforting, making it a classic homemade treat.
Ingredients
Main Ingredients:
-
2 cups whole milk
-
½ cup granulated sugar
-
¼ cup unsweetened cocoa powder
-
3 tablespoons cornstarch
-
¼ teaspoon salt
-
1 teaspoon vanilla extract
-
2 tablespoons butter
Optional Add-Ons:
-
Chocolate chips (for extra richness)
-
Whipped cream
-
Shaved chocolate
-
Fresh berries
Instructions
Step 1: Mix the Dry Ingredients
In a medium saucepan, whisk together sugar, cocoa powder, cornstarch, and salt until well combined. This prevents lumps from forming later.
Step 2: Add the Milk
Gradually pour in the milk while whisking continuously to create a smooth mixture.
Step 3: Cook Until Thick
Place the saucepan over medium heat and cook while stirring constantly. After about 5–8 minutes, the mixture will begin to thicken and bubble.
Step 4: Add Butter and Vanilla
Remove from heat and stir in the butter and vanilla extract until fully melted and incorporated.
Step 5: Chill the Pudding
Pour the pudding into serving bowls. Cover with plastic wrap directly touching the surface (to prevent a skin from forming) and refrigerate for at least 2 hours.
Step 6: Serve and Enjoy
Top with whipped cream or chocolate shavings before serving for a bakery-style finish.
Tips for Success
✅ Whisk constantly to avoid lumps.
✅ Use whole milk for the creamiest texture.
✅ For deeper flavor, add a handful of dark chocolate chips while the pudding is hot.
✅ Let it chill completely so it sets properly.
✅ If the pudding gets too thick, whisk in a splash of milk.
Advantages
✔ Quick and easy to prepare
✔ Uses simple pantry ingredients
✔ No oven required
✔ Kid-friendly dessert
✔ Easily customizable
Disadvantages
❌ Requires chilling time before serving
❌ Can form lumps if not stirred properly
❌ Not dairy-free unless modified
FAQs
Can I make chocolate pudding without cornstarch?
Yes, you can substitute it with arrowroot powder or use egg yolks for thickening, though the texture may vary slightly.
How long does homemade pudding last?
Store it in an airtight container in the refrigerator for up to 3–4 days.
Can I use plant-based milk?
Absolutely! Almond, soy, or oat milk work well, though the pudding may be slightly less creamy.
Why is my pudding lumpy?
Lumps usually form when the mixture isn’t whisked continuously while heating. Strain it through a sieve to fix the texture if needed.
Conclusion
This Simple Chocolate Pudding is proof that homemade desserts don’t have to be complicated. With its rich taste, creamy texture, and easy preparation, it’s a recipe you’ll want to make again and again.
Serve it at gatherings or enjoy it as a comforting treat after dinner — either way, every spoonful is pure chocolate happiness 🍫
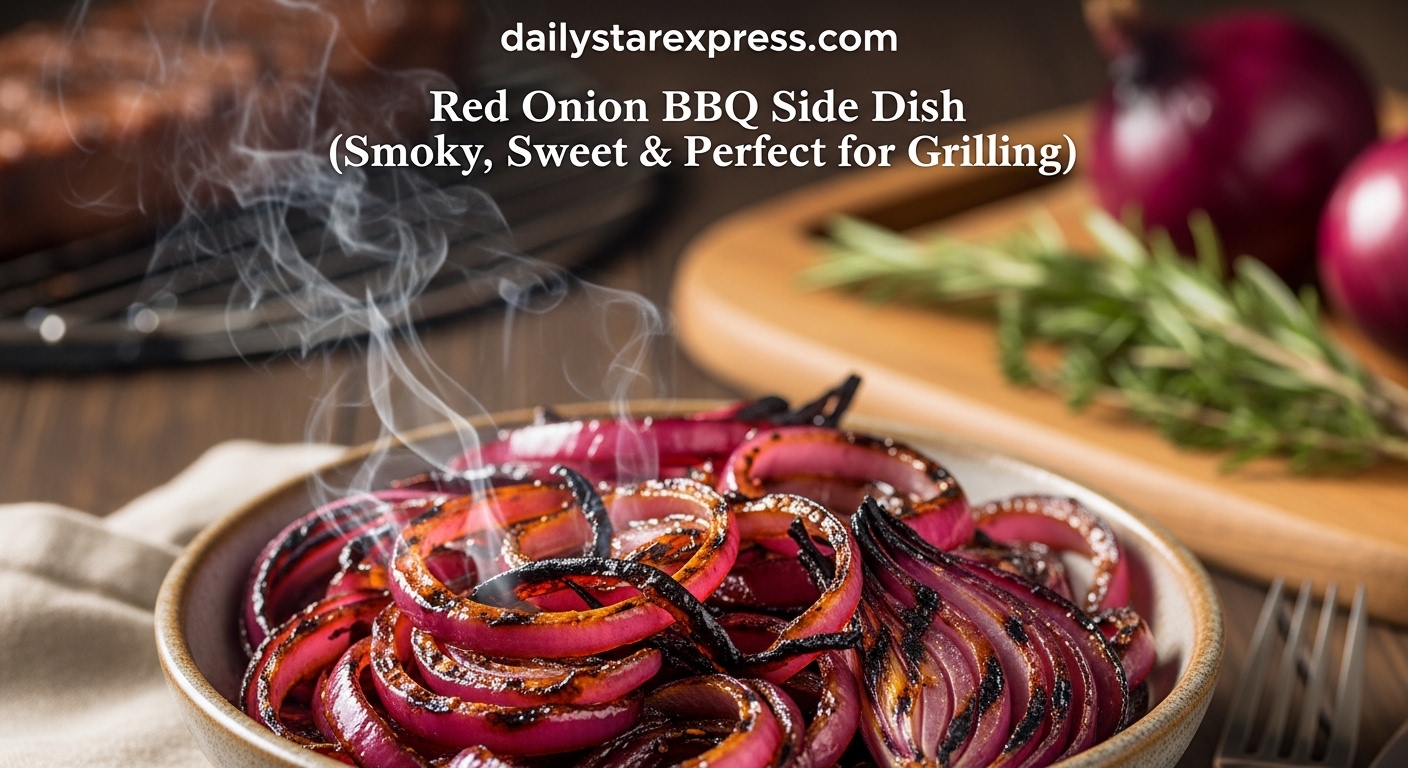
Red Onion BBQ Side Dish (Smoky, Sweet & Perfect for Grilling)
If you want a simple yet flavorful addition to your barbecue spread, this Red Onion BBQ Side Dish is a must-try. Grilling red onions enhances their natural sweetness while adding a smoky, slightly caramelized flavor that pairs beautifully with grilled meats, vegetables, or sandwiches.
This recipe is quick, beginner-friendly, and requires only a handful of ingredients.
Table of Contents
-
What Is a Red Onion BBQ Side Dish?
-
Ingredients
-
Instructions
-
Tips for Success
-
Advantages
-
Disadvantages
-
FAQs
-
Conclusion
What Is a Red Onion BBQ Side Dish?
A red onion BBQ side dish typically involves slicing onions, brushing them with olive oil, seasoning with salt and pepper, and grilling them until tender with beautiful char marks. Cooking onions over medium heat softens their texture and brings out their natural sweetness.
Ingredients
Main Ingredients:
-
2 large red onions, peeled and sliced into thick rounds
-
1–2 tablespoons olive oil
-
Salt, to taste
-
Freshly ground black pepper
Optional Flavor Boosters:
-
Balsamic vinegar
-
Fresh rosemary or parsley
-
Garlic cloves
-
Red wine vinegar
Instructions
Step 1: Preheat the Grill
Preheat your barbecue or grill pan so it’s hot before adding the onions.
Step 2: Prepare the Onions
Slice the onions into thick pieces and lightly brush them with olive oil to prevent sticking.
Step 3: Grill Until Tender
Place the onion slices on the grill and cook for about 6–8 minutes, turning occasionally until they soften and develop grill marks.
Step 4: Season and Serve
Remove from the grill, season with salt and pepper, and chop into bite-sized pieces or serve whole as a side dish.
Tips for Success
✅ Cut onions thick so they don’t fall apart on the grill.
✅ Brush oil evenly for better caramelization.
✅ For deeper flavor, toss grilled onions with balsamic vinegar and herbs.
✅ Serve warm or at room temperature for the best taste.
Advantages
✔ Quick to make – ready in about 15 minutes.
✔ Naturally vegetarian and gluten-free.
✔ Adds smoky flavor to any BBQ meal.
✔ Requires very few ingredients.
Disadvantages
❌ Can burn quickly if the grill is too hot.
❌ Strong aroma may not appeal to everyone.
❌ Best served fresh rather than stored for long periods.
FAQs
Can I add extra flavor to grilled red onions?
Yes! Heating rosemary with vinegar and tossing it with grilled onions creates an infused flavor that tastes more gourmet.
How do I keep onions from falling through the grill?
Use thicker slices or a grilling basket to hold them in place.
Are grilled onions healthy?
They are low in calories and made with minimal oil, making them a lighter BBQ side option.
What dishes pair well with this side?
Grilled onions complement steak, chicken, burgers, seafood, and roasted vegetables.
Conclusion
The Red Onion BBQ Side Dish proves that simple ingredients can create bold flavors. With smoky edges, tender layers, and natural sweetness, grilled red onions elevate any barbecue meal without adding extra effort.
Whether you’re hosting a cookout or preparing a quick family dinner, this easy side dish is guaranteed to become a regular favorite on your grill.
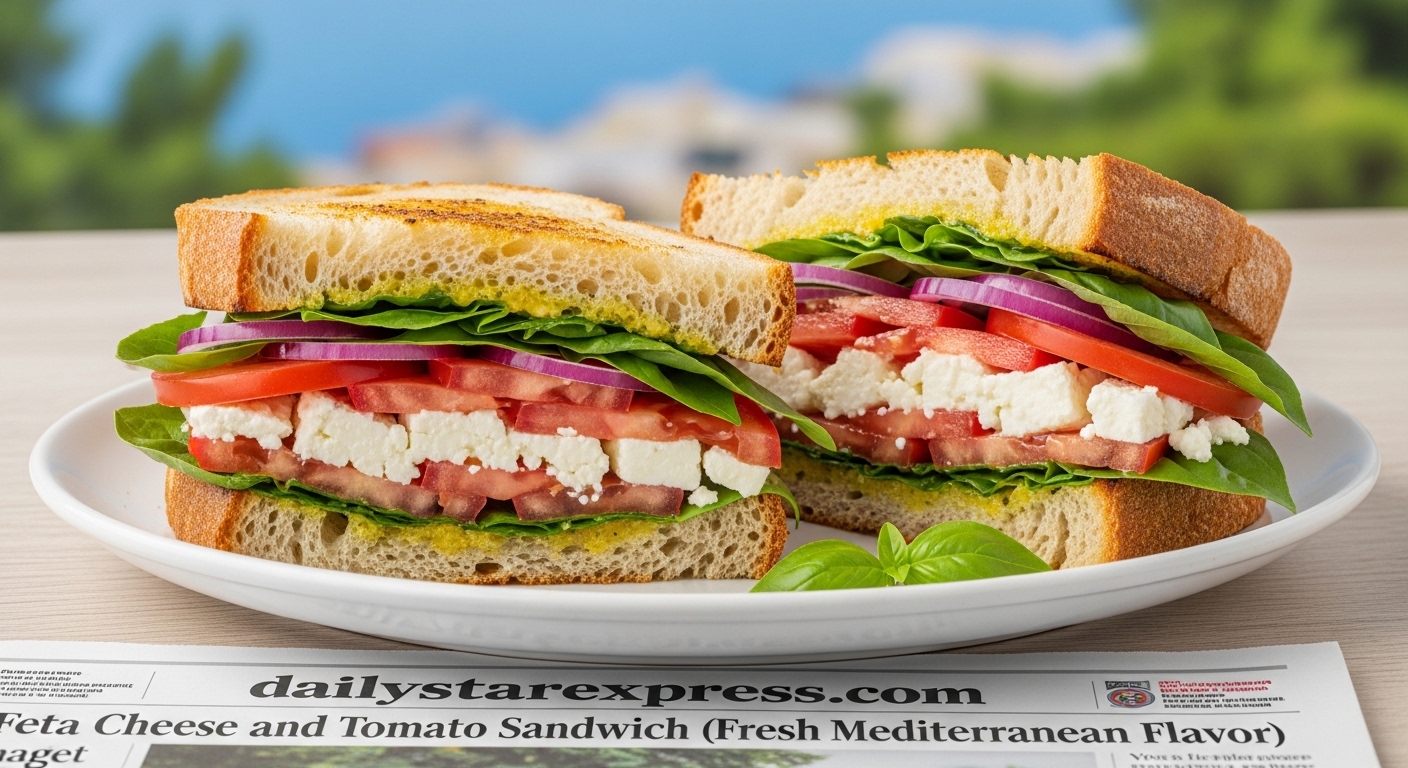
Feta Cheese and Tomato Sandwich (Fresh Mediterranean Flavor)
If you’re looking for a quick, satisfying, and flavor-packed meal, the Feta Cheese and Tomato Sandwich is a perfect choice. With creamy feta, juicy tomatoes, aromatic herbs, and crispy toasted bread, this sandwich delivers a delicious Mediterranean taste in just minutes.
Whether you need a fast lunch, light dinner, or healthy vegetarian option, this easy recipe is guaranteed to impress.
Table of Contents
-
What Is a Feta Cheese and Tomato Sandwich?
-
Ingredients
-
Instructions
-
Tips for Success
-
Advantages
-
Disadvantages
-
FAQs
-
Conclusion
What Is a Feta Cheese and Tomato Sandwich?
This sandwich combines tangy feta cheese with fresh tomatoes, olive oil, herbs, and toasted bread to create a balanced mix of creamy and refreshing flavors. It is commonly inspired by Mediterranean cooking and can be customized with herbs, onions, or greens for extra taste.
Ingredients
Main Ingredients:
-
4 slices sourdough or crusty bread
-
1 cup feta cheese
-
¼ cup extra virgin olive oil
-
1 large ripe tomato
-
Fresh basil leaves
-
Dried oregano
-
Sea salt
-
Freshly ground black pepper
Optional Add-Ons:
-
Onion slices
-
Fresh herbs like oregano or basil
-
Greens for extra freshness
Instructions
Step 1: Make the Feta Spread
Place feta, olive oil, and basil in a food processor and pulse until smooth and creamy.
Step 2: Toast the Bread
Brush the bread slices with olive oil and toast them in a hot skillet or toaster until golden and crisp.
Step 3: Assemble the Sandwich
Spread a generous layer of whipped feta on each slice, then add tomato slices and onions if using. Sprinkle dried oregano and add fresh herbs for extra aroma.
Step 4: Close and Serve
Close the sandwich and enjoy immediately while the bread is warm and crunchy.
Tips for Success
✅ Use ripe tomatoes for the best sweetness and flavor.
✅ Choose high-quality feta for a creamier texture.
✅ Toast the bread well to create a contrast with the soft filling.
✅ Add extra olive oil for a richer Mediterranean taste.
Mixing feta with herbs and seasoning before assembling can also help the flavors infuse more deeply.

Advantages
✔ Quick to prepare – ready in about 10–15 minutes.
✔ Rich in protein and calcium thanks to feta cheese.
✔ Vegetarian-friendly and easy to customize.
✔ Perfect for lunch, picnics, or light dinners.
Disadvantages
❌ Feta can be high in sodium, so those watching salt intake should use moderation.
❌ Not ideal for long storage — the sandwich tastes best when freshly made.
❌ May feel heavy if too much cheese or oil is added.
FAQs
Can I grill this sandwich?
Yes! Assemble it and cook in a skillet until the bread is golden for a crispy texture.
What bread works best?
Dense breads like sourdough or other crusty loaves hold the filling well and toast beautifully.
Can I make it healthier?
Use whole-grain bread and add vegetables like spinach or cucumbers for extra nutrients.
How many calories are in this sandwich?
A typical serving contains about 757 calories, depending on ingredients and portions.
Conclusion
The Feta Cheese and Tomato Sandwich is proof that simple ingredients can create incredible flavor. Creamy whipped feta, juicy tomatoes, and crispy bread come together in a meal that is both comforting and refreshing.
Best of all, it’s quick, customizable, and perfect for busy days — once you try it, this sandwich might become a regular favorite in your kitchen.

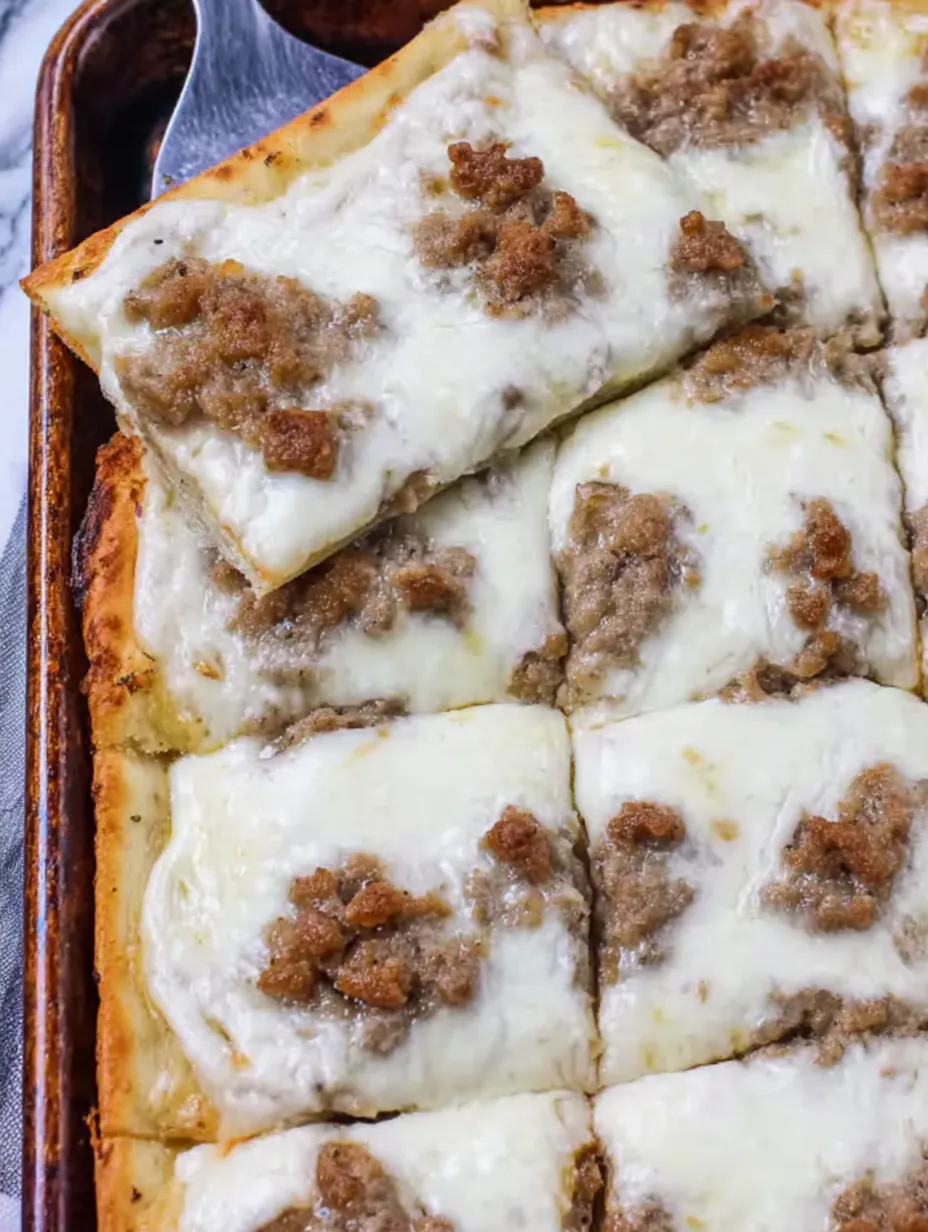
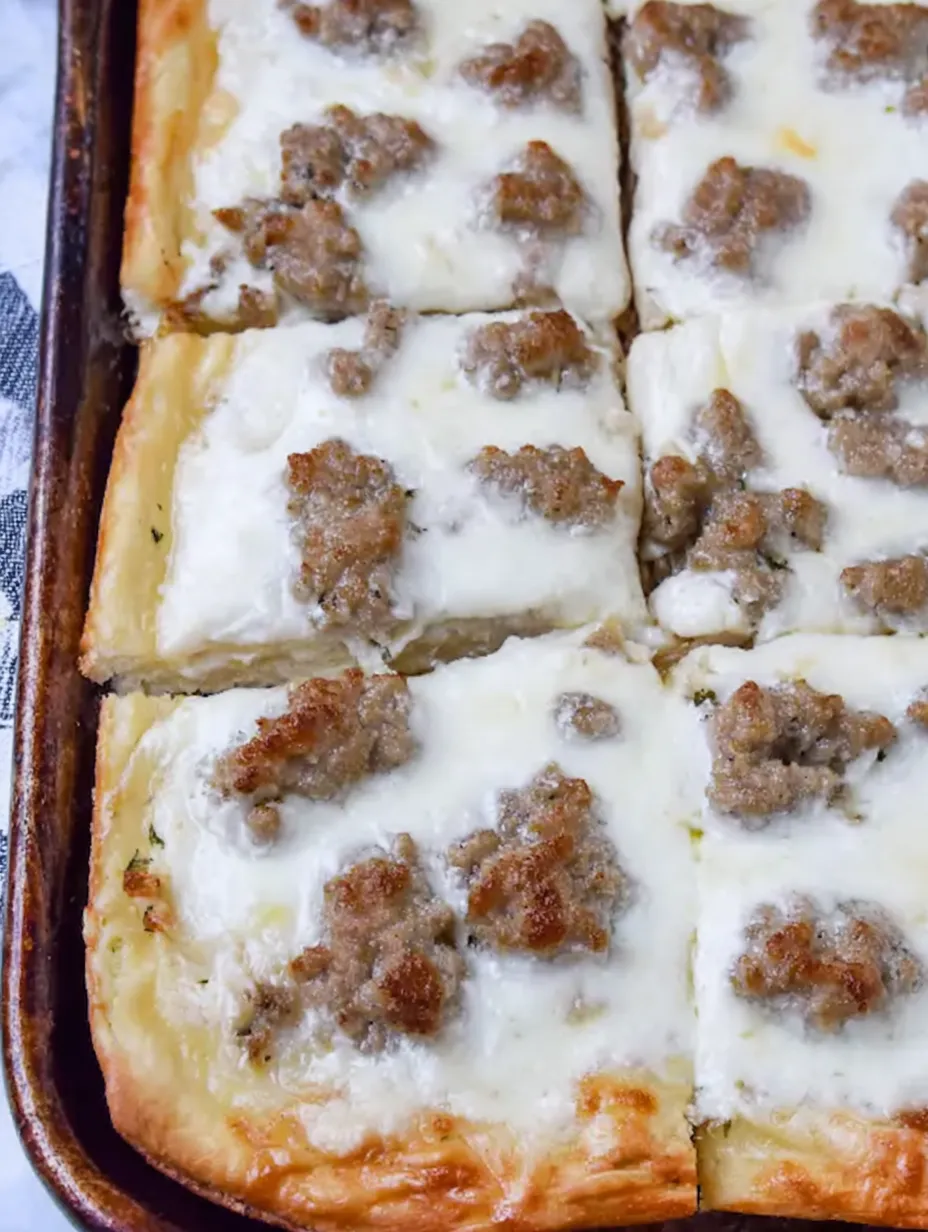
School Cafeteria Breakfast Pizza
This nostalgic school cafeteria breakfast favorite starts with fluffy pizza crust, topped with creamy white country gravy, shredded mozzarella cheese, and crumbled pork sausage. Baked until golden and bubbly, it’s a hearty, satisfying option for breakfast, lunch, or even dinner. Customize with toppings like bacon, scrambled eggs, or diced ham, and don’t forget to let it rest before slicing so the cheese sets perfectly. Served hot, it’s a comforting bite perfect for feeding a hungry crowd or bringing back delicious memories of school mornings.
This school cafeteria breakfast pizza takes me straight back to busy mornings when the lunch ladies seemed to know just what we needed a warm flaky slice loaded with creamy gravy cheese and plenty of breakfast sausage. It is no wonder this classic is still requested in so many homes and cafeterias because it is hearty feels special and comes together so quickly you can make it any day of the week.
The first time I made this at home my family devoured the entire pan before I could grab seconds and now it is a weekend must have for brunch or even breakfast for dinner
Ingredients
- Refrigerated classic pizza crust: gives a golden chewy base with zero kneading look for a brand that says classic or original avoid thin crust for best results
- White country gravy mix: brings that creamy craveable flavor that makes this pizza so unique use a reputable brand for flavorful results or homemade if you have the time
- Shredded mozzarella cheese: melts beautifully and gives great stretch choose whole milk mozzarella for the richest flavor
- Cooked crumbled pork sausage: adds smoky savory bites go for a breakfast style sausage with plenty of seasoning and brown it well for lots of flavor
- Nonstick cooking spray: ensures the crust does not stick to the pan use a high quality spray to avoid any sticking nightmares

Step by Step Instructions
- Prepare the Sheet Pan:
- Spray an eleven by fifteen inch rimmed baking sheet generously with nonstick cooking spray to prevent sticking and make cleanup easy
- Shape the Dough:
- Open and carefully unroll the pizza dough place it in the center of your pan then use your fingers to gently stretch and press the dough evenly across the bottom and up the sides about one quarter inch for a nice sturdy edge
- Pre Bake the Crust:
- Slide the pan into a four hundred degree oven and bake for six minutes this step starts setting the dough so it does not get soggy
- Make and Spread the Gravy:
- While the crust prebakes prepare your white country gravy mix according to the package directions whisk until smooth and thick then spread a generous layer over the hot crust making sure to go right to the edges
- Add Cheese and Sausage:
- Scatter the shredded mozzarella evenly over the gravy then sprinkle the cooked sausage crumbles over the cheese try to distribute everything so that each slice gets plenty of topping
- Final Bake:
- Return the pan to the four hundred degree oven and bake for another ten to twelve minutes until the crust turns golden brown the cheese is bubbly and everything smells amazing
- Rest and Slice:
- Remove from the oven and let the pizza rest for five minutes this waiting time allows the cheese to set so you will get neat slices and no toppings sliding off
- Slice and Serve:
- Cut the pizza into squares serve warm and watch it disappear
 Save
Save
Cheese is always my favorite part and I love piling on extra mozzarella before baking My kids and I sometimes set up a fun toppings bar and everyone customizes their own corner it turns breakfast into a party
Storage Tips
Leftovers can be cooled completely then wrapped or stored in an airtight container in the refrigerator for up to three days Reheat slices in the oven or toaster oven for best results as microwaving can make the crust chewy You can also freeze individual slices by wrapping them tightly they reheat best from thawed
Ingredient Substitutions
You can swap mozzarella for any melty cheese like cheddar or Monterey Jack Try turkey sausage or crumbled bacon if you do not have pork sausage If you want a from scratch touch make your own country gravy with milk flour and plenty of black pepper
 Save
SaveServing Suggestions
Pair this pizza with a fresh fruit salad or a big platter of citrus for balance Offer hot sauce or salsa on the side for those who like a little kick and serve with orange juice or chocolate milk for a real cafeteria flashback
Cultural and Historical Context
Breakfast pizza became popular in American schools in the late twentieth century as a creative way to serve classic breakfast flavors in an easy to eat form It makes sense that it continues to thrive since it combines two beloved meals pizza and breakfast into one comforting dish
Recipe FAQs
- → What type of pizza crust works best?
- Refrigerated classic pizza crust offers a quick, fluffy base, but homemade or store-bought dough will also work well.
- → Can I use a different gravy?
- While white country gravy is traditional, sausage or pepper gravy also delivers savory flavor and creamy texture.
- → What cheese melts best for this dish?
- Mozzarella creates a gooey, satisfying melt, but cheddar or Colby Jack can be added for extra richness.
- → How do I keep the cheese from sliding off?
- Let the pizza rest for five minutes after baking. This helps the cheese set and makes slicing neater.
- → Can I add extra toppings?
- Absolutely! Crumbled bacon, scrambled eggs, or diced ham make great additions. Set out a toppings bar for variety.
- → Is this suitable for meal prepping?
- Yes, leftovers can be refrigerated and briefly reheated; the crust stays soft and flavors meld overnight.
School Cafeteria Breakfast Pizza
Soft pizza crust topped with savory gravy, sausage, and cheese—just like you remember from school mornings.
5 min
15 min
20 min
Ingredients
→ Base
→ Toppings
Steps
Spray an 11×15-inch rimmed baking sheet with non-stick cooking spray.
Open and unroll the pizza dough. Place it in the middle of the pan and spread/press it evenly to the edges and slightly up the sides by 1/4 inch.
Bake the crust at 400°F for 6 minutes.
Prepare the gravy mix according to package instructions and spread it evenly over the crust until it meets the edges.
Sprinkle the shredded mozzarella cheese evenly over the gravy, followed by the cooked crumbled sausage.
Bake the pizza at 400°F for 10-12 minutes, or until the crust is cooked through and the edges are golden brown.
Carefully remove the pizza from the oven and let it rest for 5 minutes. Slice and serve warm.
Tips
- Consider adding other toppings such as extra sausage, bacon, scrambled eggs, diced ham, or cheddar cheese for additional flavor.
- Set up a toppings bar for personalization, especially for kids.
- Do not skip the resting period after baking as it allows the cheese to set, preventing it from sliding off when slicing.
Required Tools
- Rimmed baking sheet (11×15-inch)
- Non-stick cooking spray
Allergy Information
Always check each ingredient for allergens, and consult a medical professional if unsure.
- Contains dairy (mozzarella cheese, gravy mix)
- Contains gluten (pizza crust, gravy mix)
- Contains pork (sausage)
Nutritional Information (per serving)
These details are shared for general guidance and don’t replace professional advice.
- Calories: 273
- Fats: 14 g
- Carbohydrates: 23 g
- Proteins: 13 g
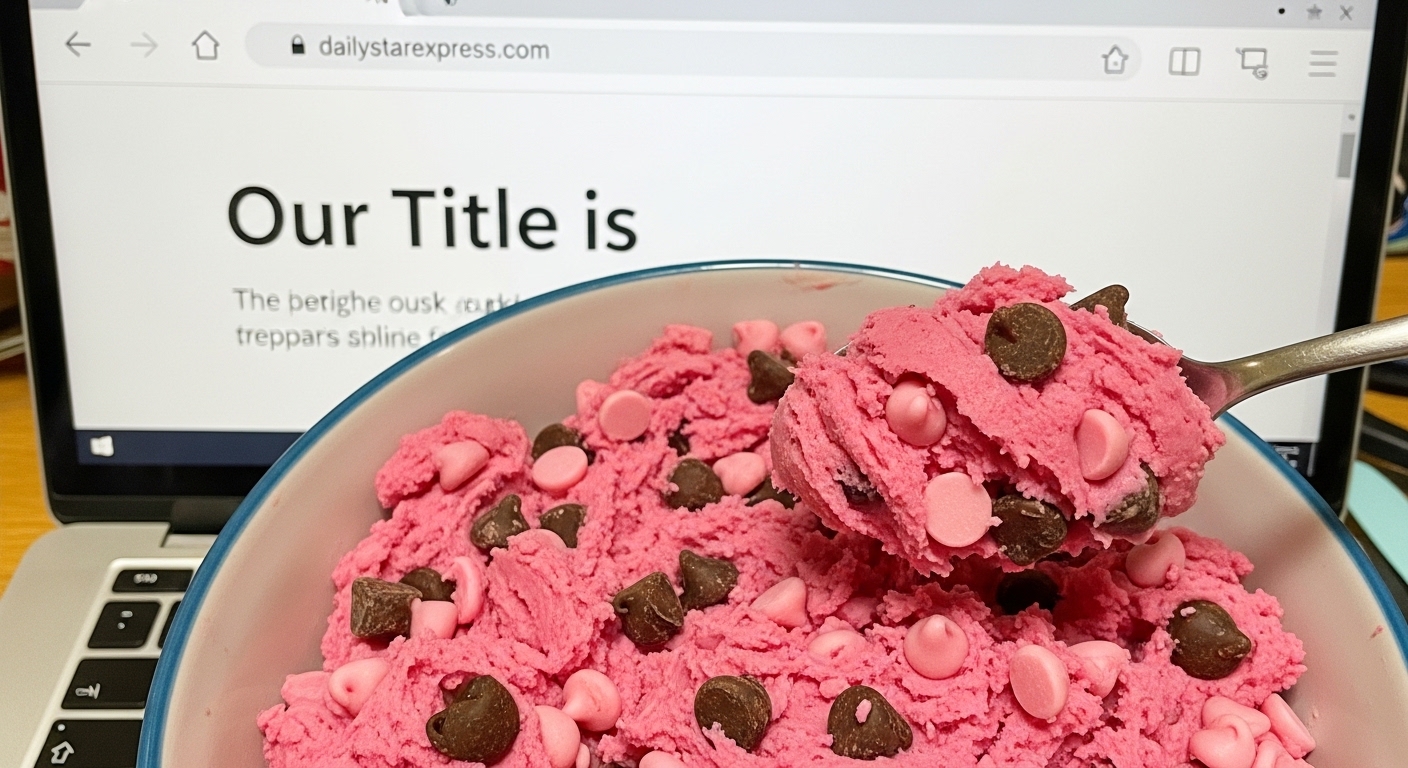
Pink Chocolate-Chip Cookie Dough
Enjoy a fusion of chocolate brownie and pink chocolate chip dough for a playful bite-sized indulgence. Each piece features a fudgy brownie base, enriched with cocoa and vanilla, crowned with creamy, egg-free cookie dough brightened by mini chocolate chips. A silky chocolate drizzle brings it all together, adding a glossy finish. Quick baking, simple layering, and a brief chill set these sweet treats perfectly for sharing or snacking. Serve slightly chilled for the best texture, with the delicate cookie dough contrasting the rich, tender brownie beneath.
These pink chocolate chip cookie dough brownie bites are my favorite pick-me-up whenever I want a treat that pairs fun color with classic flavors. They combine rich fudgy brownies with a playful layer of egg-free cookie dough and a finishing chocolate drizzle. Perfect for birthday parties or anytime you want something joyfully nostalgic that disappears fast at gatherings.
The first time I made them was for a bake sale at my daughter’s school and they sold out in minutes. Now they are a go-to for potlucks and family nights because everyone seems to light up when they see them.
Ingredients
- Unsalted butter: for fudgy texture and flavor in both layers
- Granulated sugar: which helps brownies stay moist and gives great structure
- Large eggs: to create that classic brownie chewiness
- Vanilla extract: for warmth and deep aroma in every bite
- Unsweetened cocoa powder: for a chocolate base that is rich and not too sweet Use a high-quality Dutch process if you want a darker color
- All-purpose flour: to provide structure in both brownie and cookie dough layers Heat treated flour is important for food safety in egg-free dough
- Salt: which balances the sweetness and deepens the chocolate taste
- Brown sugar: in the cookie dough for chewy softness and a hint of caramel
- Milk: to bring the dough together and keep it creamy If you love extra tender dough whole milk works best
- Mini chocolate chips: for even distribution and pockets of chocolate in every bite
- Semi-sweet chocolate chips: for a not-too-sweet drizzle on top You can swap with dark or milk chocolate depending on your taste
- Butter or cream: for the drizzle if you want it extra smooth and glossy
Step-by-Step Instructions
- Prepare Brownie Batter:
- Melt the butter until smooth and whisk it well with granulated sugar in a large bowl until glossy and pale This helps dissolve the sugar and gives a shiny top Crack in the eggs and vanilla and mix until just combined Add cocoa powder flour and salt and fold gently with a spatula until you cannot see streaks Be careful not to overmix so your brownies stay soft
- Bake Brownie Bites:
- Preheat your oven to 350 degrees Fahrenheit and grease a mini muffin pan thoroughly Spoon the brownie batter into each cavity about two thirds up so they have room to rise Bake for 15 to 18 minutes until the tops are just set If you press lightly they should feel springy with a touch of fudgy softness Cool the brownie bites in the pan for at least 10 minutes then carefully remove and let them cool fully on a rack
- Make Egg-Free Cookie Dough:
- In another bowl beat softened butter with brown sugar and granulated sugar for at least 3 minutes scraping the bowl for fluffiness Pour in the milk and vanilla then mix again Make sure your flour is cooled after heat treating for safety Sift it in Last gently fold in mini chocolate chips so they are evenly spread through the dough The dough should be creamy and scoopable
- Assemble the Bites:
- Once brownie bites are cooled use a small spoon or scoop to add a mound of cookie dough on top Gently press the dough so it sticks but holds its round shape Chill briefly so the layers firm up
- Add Chocolate Drizzle:
- In a heatproof bowl melt semi-sweet chocolate chips alone or with butter or cream for about 30 seconds in the microwave stirring between bursts When melted smooth then spoon or drizzle over each bite Let chill in the fridge until the chocolate sets for about 20 minutes
 Save
Save
My favorite part is sneaking a taste of the cookie dough before it gets added on top It reminds me of baking cookies as a little kid using the same wooden spoon my mother used There is something extra nostalgic about that first frosting of chocolate drizzle too
Storage Tips
Store your assembled brownie bites in a sealed container in the fridge They stay fresh and chewy for up to 5 days If you want to keep them longer layer them between parchment paper and freeze for up to one month When ready to eat just let them thaw in the fridge overnight
Ingredient Substitutions
If you are dairy free you can use vegan butter and plant milk Use gluten free flour if needed Instead of mini chocolate chips try chopped white chocolate or colored sprinkles in the cookie dough for a festive twist Natural food coloring is a good option if you want the dough more pink without artificial dyes
 Save
SaveServing Suggestions
Serve them on a platter with a bowl of ice cream for the ultimate sundae bar If you are having a party arrange them in mini cupcake liners and sprinkle with extra mini chocolate chips to make a picture perfect dessert buffet
Cultural Context
These treats combine two of America’s favorite sweets brownies and chocolate chip cookies into one mouthwatering bite The cookie dough is made egg free for safety so it keeps the playfulness of eating raw dough with none of the worry Many people have fond childhood memories of scraping the mixing bowl so adding the pink color makes them just right for Valentine’s or baby showers
Recipe FAQs
- → How do I ensure the brownie base stays fudgy?
- Bake only until just set and let cool completely; avoid overbaking for ultimate fudginess.
- → Is it safe to eat the cookie dough layer?
- Yes, the dough is egg-free and uses heat-treated flour, making it safe for enjoying raw.
- → Can I use milk chocolate chips for the drizzle?
- Absolutely! Swap semi-sweet chips for milk or even white chocolate as you like.
- → Should the dough be chilled before assembling?
- For easier handling, briefly chill the dough, but ensure it remains soft enough to press onto brownies.
- → Can these bites be frozen?
- Yes, layer between parchment and freeze in an airtight container for up to one month for best texture.
- → How do I achieve the pink hue?
- Add a drop or two of pink food coloring to the cookie dough for a vibrant touch.
Pink Chocolate-Chip Cookie Dough
Fudgy brownie base topped with pink chocolate chip dough and a drizzle of melted chocolate.
20 min
18 min
38 min
Ingredients
→ Brownie Layer
→ Cookie Dough Layer (Egg-Free)
→ Chocolate Topping

Steps
Preheat oven to 350°F (175°C) and grease or line a mini muffin pan. Whisk melted butter and sugar, then add eggs and vanilla. Stir in cocoa powder, flour, and salt until smooth. Fill cavities about two-thirds full and bake for 15–18 minutes, or until just set but still fudgy. Let cool completely.
Cream butter with both sugars until fluffy. Mix in milk and vanilla. Add heat-treated flour, then fold in mini chocolate chips.
Press a small scoop of cookie dough gently onto each cooled brownie bite.
Melt chocolate chips (with butter or cream if using) and drizzle over the tops. Chill for about 20 minutes until set.
Tips
- Heat-treat the flour by microwaving it for 1 minute, stirring every 20 seconds, and let it cool completely.
Required Tools
- Mini muffin pan
- Mixing bowls
- Microwave-safe bowl
- Whisk
- Rubber spatula
Allergy Information
Always check each ingredient for allergens, and consult a medical professional if unsure.
- Contains dairy (butter)
- Contains wheat (all-purpose flour)
- Contains eggs
- Contains chocolate
Nutritional Information (per serving)
These details are shared for general guidance and don’t replace professional advice.
- Calories: 180
- Fats: 9 g
- Carbohydrates: 24 g
- Proteins: 2 g
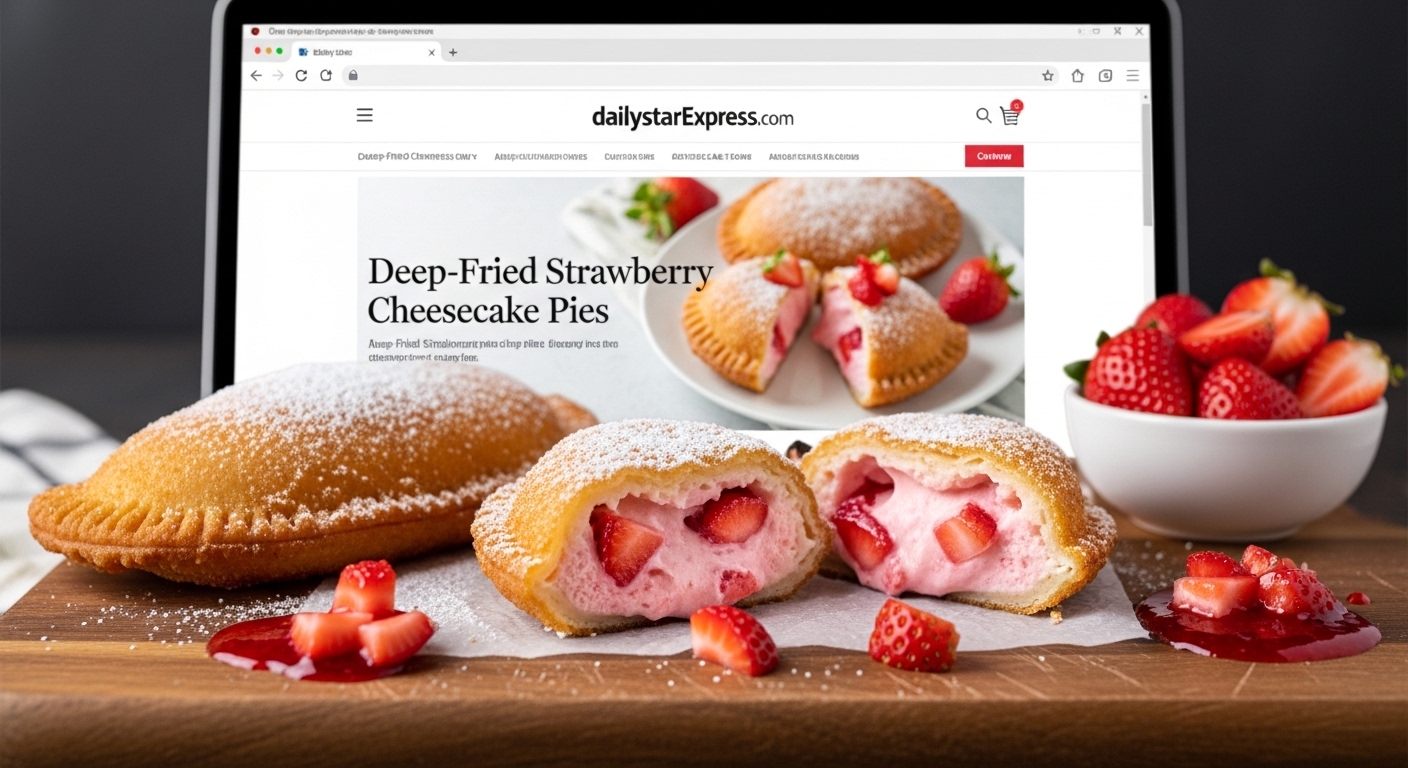
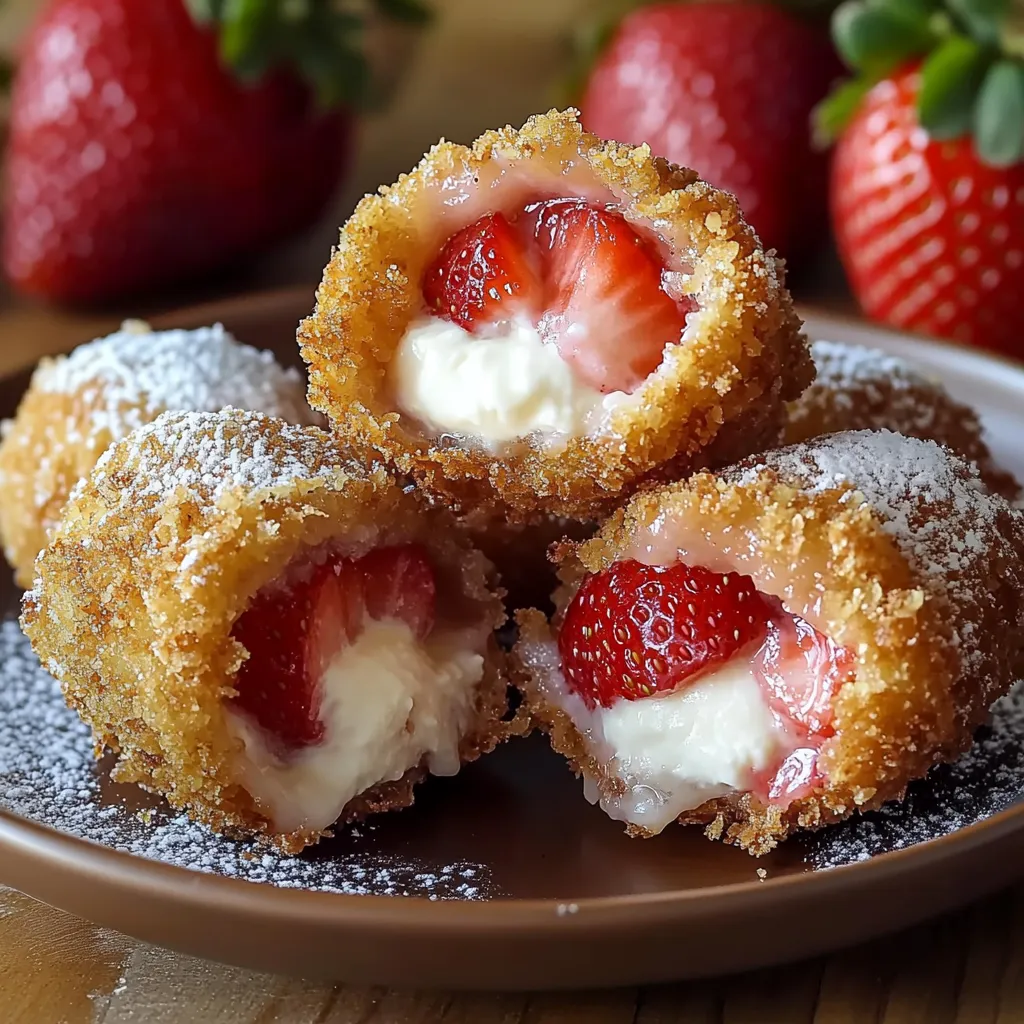
Deep-Fried Strawberry Cheesecake Pies
Enjoy the nostalgic flavor of deep-fried strawberry cheesecake pies—crisp, golden on the outside and soft, creamy in the center. Each bite features a rich vanilla cheesecake base layered with juicy strawberries, all wrapped in flaky dough and finished with a sugary dusting. These handheld treats are party-ready, easy to customize with different fillings, and irresistible warm from the fryer. Make them your own with seasonal fruit or a sprinkle of cinnamon sugar. They store and reheat beautifully, offering homemade comfort that rivals any fairground dessert. Perfect for sharing and sure to disappear fast!
Deep-Fried Strawberry Cheesecake Pies are my go-to dessert when I want to genuinely impress without fuss. With their golden, crisp shell and dreamy cheesecake-strawberry center, these pies bring a taste of the county fair right into your kitchen. The fact that you can make a whole batch in about thirty minutes only sweetens the deal. Whether you are making a treat for loved ones or looking for the ultimate comfort dessert, these mini pies check every box.

I first whipped these up for a family movie night—they disappeared before the opening credits even rolled. Since then they have become our celebration treat for birthdays and cozy weekends.
Ingredients
- Cream cheese: brings luscious tang and classic cheesecake flavor try to use full fat for richness
- Powdered sugar: sweetens and smooths out the filling choose a fine quality for a silky result
- Vanilla extract: adds warm flavor boost look for pure extract
- Fresh strawberries: deliver sweet bright flavor and juicy texture pick ripe berries with vibrant color
- Granulated sugar: draws out the strawberries juices for perfect texture
- Cornstarch: thickens the fruit filling preventing soggy dough
- Refrigerated pie-style dough or biscuit dough: keeps prep simple bake or fry for choice of texture
- Egg: helps securely seal the pies opt for large eggs
- Oil for frying: creates a golden crisp crust use a neutral oil like vegetable or canola
- Powdered sugar or cinnamon sugar: offers a finishing touch for extra sweetness
- When choosing strawberries avoid bruised or overly soft fruit and let them come to room temperature for best flavor.
Step-by-Step Instructions
- Prepare the Fillings:
- Blend softened cream cheese powdered sugar and vanilla extract in a mixing bowl until creamy and smooth. In a separate bowl mix chopped strawberries with granulated sugar and cornstarch making sure each berry piece is evenly coated to help the filling thicken as it cooks.
- Prepare the Dough:
- Take the refrigerated dough and if needed roll it out gently with a rolling pin to about quarter inch thickness. Cut the dough into even size circles or squares depending on your preferred pie shape.
- Fill the Pies:
- Scoop a generous spoonful of cheesecake filling onto the center of each dough piece. Add a small spoon of strawberry mixture on top. Lightly brush the edges of the dough with beaten egg then fold over to form a pocket and press the edges closed firmly with a fork to crate a tight seal.
- Fry:
- Pour enough oil into your deep skillet or frying pan so it reaches about one and a half inches up the side. Heat oil to around 350 degrees Fahrenheit. Working in small batches gently lower pies into the hot oil fry on each side until golden brown about two minutes per side. Remove with a slotted spoon and place on paper towels to drain excess oil.
- Finish and Serve:
- While pies are still warm dust generously with powdered sugar or cinnamon sugar. Serve immediately for the ultimate crispy creamy experience.
 Save
SaveOne of my favorite pie moments was sneaking a still warm pie to my daughter as an after-school surprise. Her eyes lit up like Christmas morning the strawberry aroma alone was enough to fill the whole kitchen with pure happiness.
Storage Tips
- Store leftovers in an airtight container in the fridge for up to three days
- Reheat pies in an oven or air fryer set to 350 degrees for five to six minutes until the crust is crisp again
- Avoid reheating in the microwave if you want to preserve the crispy shell
Ingredient Substitutions
- Raspberries blueberries or peaches can replace strawberries
- Try adding lemon or orange zest to the cheesecake filling for brightness
- Swap in chocolate or caramel chips if you crave richer flavor
- Use cream cheese alternatives if you need dairy free
Serving Suggestions
- Pair these pies with vanilla bean ice cream for extra decadence
- Drizzle warm pies with a quick vanilla glaze made from milk and powdered sugar
- Serve with a bowl of fresh berries alongside for a pretty presentation
- A mug of tea or hot chocolate complements the sweet tart filling
 Save
SaveCultural and Historical Context
- Fried pies are a classic Southern tradition dating back generations
- The idea of combining cheesecake and fried pies adds a playful modern twist
- In state fairs across America this kind of dessert brings together nostalgia and innovation
Recipe FAQs
- → Can these be baked instead of fried?
- Yes, brush them with egg wash and bake until golden. The crust will be less crisp but still delicious.
- → Is frozen fruit suitable for the filling?
- Frozen strawberries can be used if well-thawed and drained to prevent excess moisture in the pies.
- → Which dough yields the best texture?
- Pie dough offers a flaky finish, while biscuit dough provides a softer, more bread-like bite. Both work well.
- → Can I prepare them ahead of time?
- Absolutely. Assemble the pies and refrigerate them before frying; cook just before serving for best results.
- → How should leftovers be stored and reheated?
- Store in an airtight container in the refrigerator. Reheat in the oven or air fryer to restore crispness.
- → What are some topping ideas?
- Try powdered sugar, cinnamon sugar, or a vanilla glaze. Serve with whipped cream or vanilla ice cream for extra flair.
Deep-Fried Strawberry Cheesecake Pies
Crispy pies filled with rich cheesecake and strawberry, homemade for parties, holidays, or cozy weekends.
20 min
15 min
35 min
Ingredients
→ Cheesecake Filling
→ Strawberry Filling
→ For Assembly
→ Optional Topping
Steps
In a bowl, mix the cream cheese, powdered sugar, and vanilla extract until smooth and creamy.
In a separate bowl, combine the chopped strawberries, granulated sugar, and cornstarch until evenly coated.
Roll the dough slightly thinner if needed and cut into circles or squares based on your preference.
Place a spoonful of cheesecake filling in the center of each dough piece. Top with a small spoon of strawberry filling. Brush the edges with beaten egg, fold over, and seal firmly with a fork.
Working in batches, fry the pies until golden brown on both sides. Remove and drain on paper towels.
Dust the pies with powdered sugar or cinnamon sugar while still warm. Serve immediately for the best texture.
Tips
- Avoid overfilling the pies to prevent leakage during frying.
- Seal the edges of the dough tightly for best results.
- Serve warm for the creamiest texture.
Required Tools
- Mixing bowls
- Spoon or spatula
- Rolling pin (optional)
- Fork (for sealing edges)
- Frying pan or deep skillet
- Paper towels
Allergy Information
Always check each ingredient for allergens, and consult a medical professional if unsure.
- Contains dairy from cream cheese.
- Contains eggs.
Nutritional Information (per serving)
These details are shared for general guidance and don’t replace professional advice.
- Calories: 260
- Fats: 14 g
- Carbohydrates: 30 g
- Proteins: 4 g
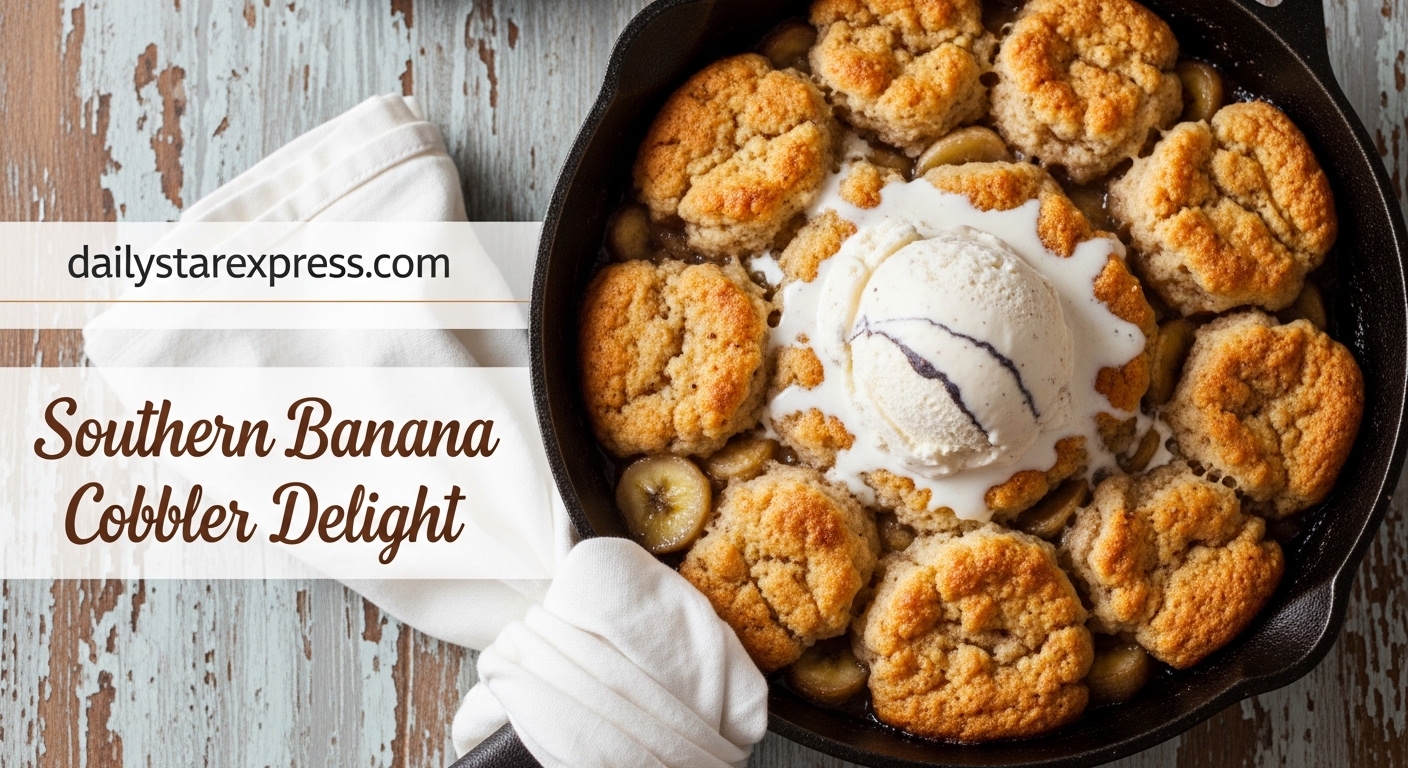
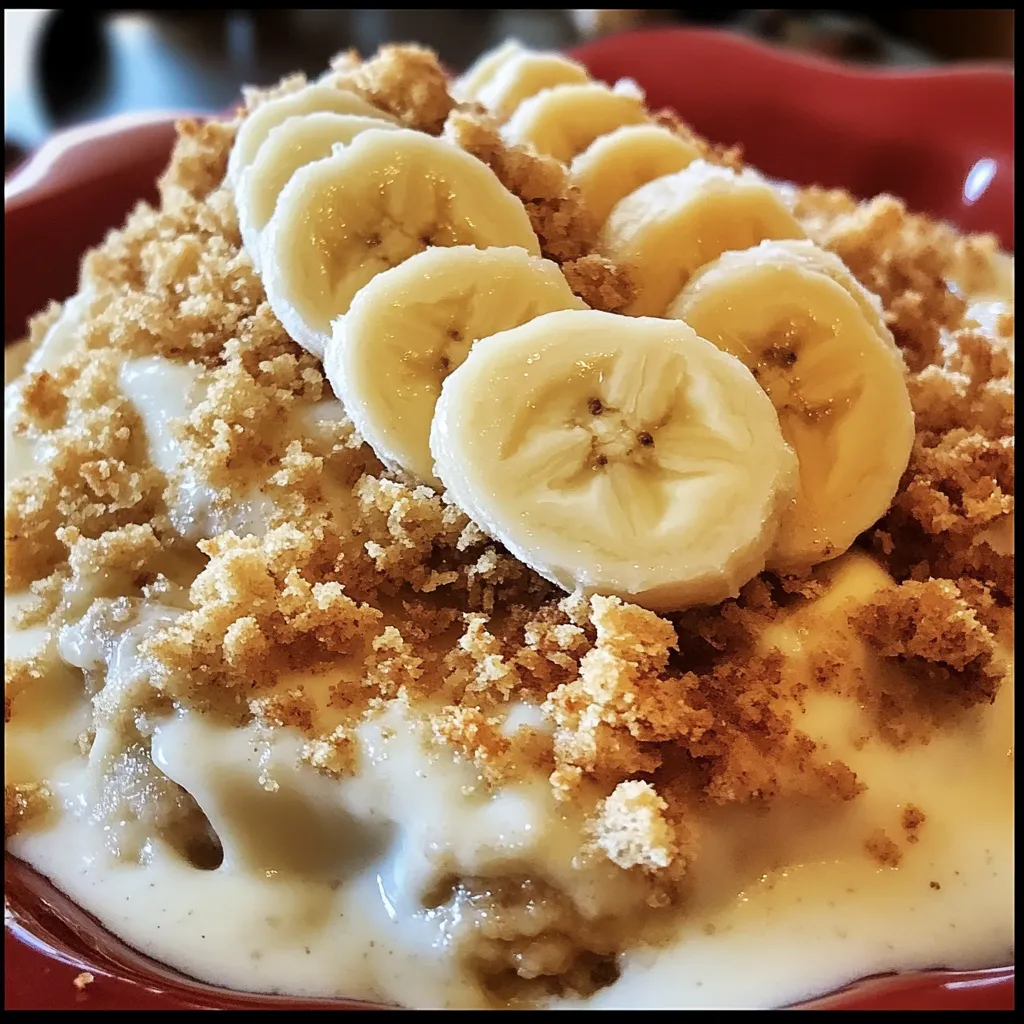
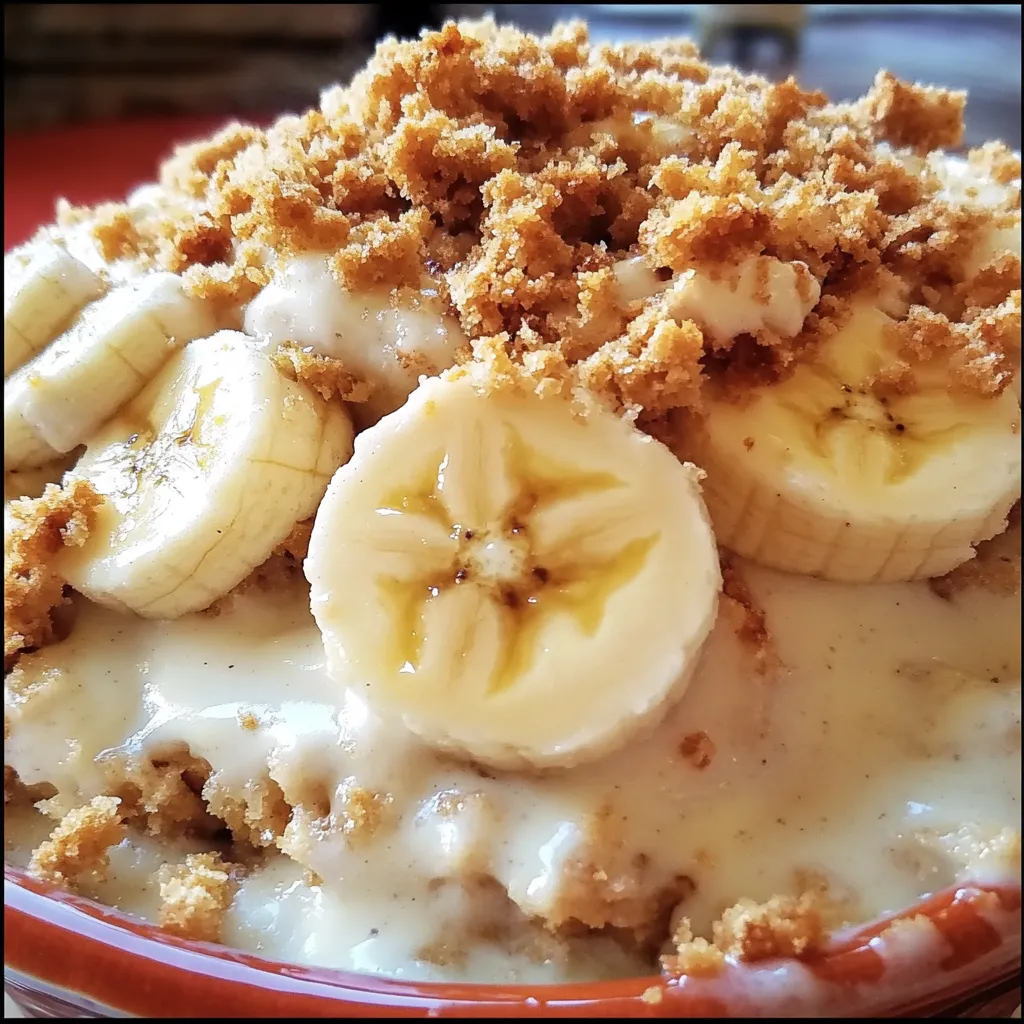
Southern Banana Cobbler Delight
This Southern banana cobbler features ripe banana slices nestled in a sweet, buttery batter and topped with a golden oat-pecan crumble. The layered filling bakes until puffy and set while the generous crumb topping turns crisp and fragrant in the oven. Each spoonful brings together gooey fruit, toasty pecans, and a softly caramelized crunch, making it perfect for cozy gatherings or a comforting treat. Serve warm with a scoop of vanilla ice cream and extra fresh banana for classic Southern comfort on any occasion.
Southern Banana Cobbler is the dessert you need when you want a cozy old-fashioned treat that wraps your whole kitchen in the scent of caramelized bananas and toasty pecans. The soft bubbling filling and crunchy oat topping make this a family favorite for every banana lover.
I first baked this on a rainy afternoon when my daughter brought home bananas that were a little too spotty to eat. Now we cheer when they start to over-ripen just so we have the excuse to make this cobbler again.
Ingredients
- Light brown sugar: For the topping brings a deep caramel-like sweetness that pairs perfectly with bananas
- Self-rising flour: Ensures a soft thick cobbler base look for flour with baking powder and salt already mixed in
- Unsalted butter: Both in the topping and filling gives rich flavor and perfect texture always use real butter for best results
- Old-fashioned oats: Give the topping its chewy crumbly bite avoid quick oats for the best texture
- Chopped pecans: Add a toasty nutty crunch buy them pre-chopped or chop whole ones just before adding
- Regular white sugar: Sweetens the filling look for fine granulated sugar for easy blending
- Whole milk: Creates a tender moist filling whole milk works best but two percent will do in a pinch
- Banana extract (optional): Seriously amps up the banana flavor without artificial aftertaste select pure banana extract if possible
- Very ripe bananas, sliced: When the skins are deeply spotted will make the filling extra sweet and fragrant
- For a selection tip: Always choose bananas with lots of brown spots but no soft mushy ends
Step-by-Step Instructions
- Preheat and Prep:
- Heat your oven to 375 degrees Fahrenheit and lightly grease a two-quart or nine by nine inch baking dish with your favorite baking spray or a pat of butter. This keeps the filling from sticking and helps with cleanup later.
- Mix the Streusel Topping:
- In a medium mixing bowl combine light brown sugar and self-rising flour. Add the softened butter and use a fork to mash the mixture together until it forms a crumbly texture with no big bits of butter remaining. Stir in the old-fashioned oats and chopped pecans mixing until everything is evenly distributed. Set this bowl aside on the counter.
- Make the Filling:
- In a separate large bowl whisk together self-rising flour sugar and milk just until the mixture is smooth. Avoid overmixing as that can make the base tough. Gently whisk in the melted butter until glossy. If using banana extract add it now and whisk again.
- Assemble in the Baking Dish:
- Pour the filling mixture straight into your prepared baking dish. Use a spatula to spread it evenly all the way to the edges. Layer the sliced bananas across the top overlapping slightly so every scoop gets plenty of banana flavor.
- Add the Topping:
- Use your hands or a spoon to sprinkle the streusel topping over the bananas making sure to cover the whole surface. The layer should be even but do not pack it down. The uneven bits will bake up extra crisp.
- Bake the Cobbler:
- Place the dish on the middle rack of your preheated oven and bake for forty five to fifty minutes. The top should be golden brown and you should see bubbling edges. If you like things extra toasty let it bake the full fifty minutes.
- Serve:
- Let the cobbler sit for at least ten minutes before serving so the filling sets. Scoop it warm into bowls. This cobbler is incredible as is but I highly recommend topping it with a scoop of vanilla ice cream and some extra sliced bananas.
 Save
SaveBanana extract is my secret weapon because even the ripest bananas can sometimes bake off a little flat. My sister first brought a bottle home from a baking supply shop and we have never looked back. Now even my kids know to ask for a dash of it in every batch. The smell alone brings us all into the kitchen.
Storage Tips
Refrigerate leftovers as soon as the cobbler is cool. Cover tightly with foil or a fitted lid and store for up to four days. Warm portions in the microwave for thirty seconds or let them come to room temperature before serving. For longer storage scoop extra cobbler into a freezer-safe container and freeze for up to two months. Thaw overnight in the fridge then reheat in the oven to crisp the topping again.
Ingredient Substitutions
If you need nuts to be omitted use sunflower seeds or toasted coconut flakes instead. Gluten-free all-purpose baking mixes with added leaveners can replace the self-rising flour. I have used almond milk as a swap for whole milk with great results. If you do not have banana extract just use extra ripe bananas and a splash of vanilla.
 Save
SaveServing Suggestions
Serve the cobbler warm from the oven with homemade whipped cream or a big scoop of vanilla ice cream. For brunch let it cool and cut into thick slices—drizzle with caramel sauce and sprinkle a little cinnamon on top. It is also wonderful paired with a fresh fruit salad for a lighter dessert spread.
Cultural and Historical Context
Banana cobbler is a Southern twist on the old-time peach or berry cobblers. Southern kitchens always seemed to have a few soft bananas lying about so cooks got creative turning mashed bananas and pantry staples into a comforting dessert. Today cobblers like this one are a symbol of resourcefulness and hospitality—a dish for gatherings when you want everyone to feel right at home.
Recipe FAQs
- → Can I use fresh bananas instead of extract?
- Yes, sliced ripe bananas add plenty of flavor. Banana extract is optional for extra aroma.
- → Is it possible to make this dessert ahead of time?
- You can bake it a day ahead and reheat before serving. Add ice cream or fresh banana just before enjoying.
- → What type of oats work best for the topping?
- Old-fashioned oats provide a hearty texture, but quick oats can be used for a finer crumble.
- → Can I substitute nuts in the topping?
- Pecans add a traditional Southern touch, but walnuts or almonds work well, or omit for nut-free.
- → How do I know the cobbler is done baking?
- The crumble should be golden brown and the filling set, with the edges bubbling gently.
- → What serving suggestions pair well with this dessert?
- Warm servings with vanilla ice cream or whipped cream complement the flavors beautifully.
Southern Banana Cobbler Delight
Warm, comforting Southern dessert with ripe bananas, golden oat-pecan topping, and sweet rich filling.
15 min
45 min
60 min
Ingredients
→ For the topping
→ For the filling
Steps
Preheat your oven to 375°F (190°C) and grease a 2-quart (or 9×9-inch) baking dish with nonstick cooking spray.
In a bowl, use a fork to mix the brown sugar, flour, and softened butter until crumbly. Add oats and pecans, mix well, and set aside.
Whisk together flour, sugar, and milk until just blended. Stir in melted butter. Pour this mixture into the prepared baking dish.
Layer the sliced bananas on top of the filling.
Sprinkle the prepared streusel topping evenly over the bananas.
Bake for 45-50 minutes until golden brown and set.
Serve warm. For an extra treat, top with a scoop of vanilla ice cream and additional banana slices.
Tips
- For a flavorful twist, consider adding a dash of cinnamon or nutmeg to the streusel topping.
Required Tools
- Fork
- 2-quart baking dish or 9×9-inch pan
- Mixing bowl
- Whisk
Allergy Information
Always check each ingredient for allergens, and consult a medical professional if unsure.
- Contains gluten (self-rising flour)
- Contains dairy (butter and milk)
- Contains tree nuts (pecans)
Nutritional Information (per serving)
These details are shared for general guidance and don’t replace professional advice.
- Calories: 380
- Fats: ~
- Carbohydrates: ~
- Proteins: ~

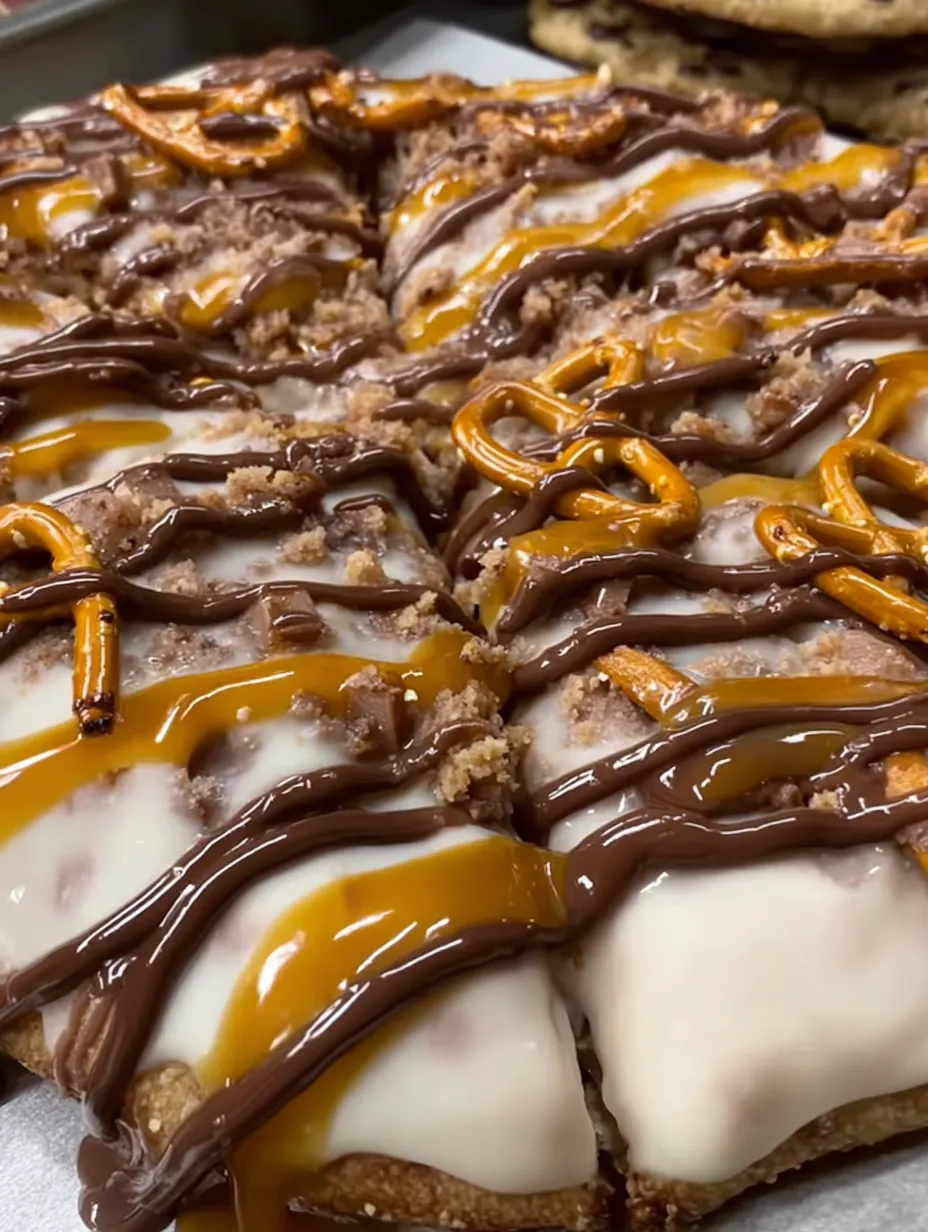
Cookie Dough Stuffed Crust Pizza
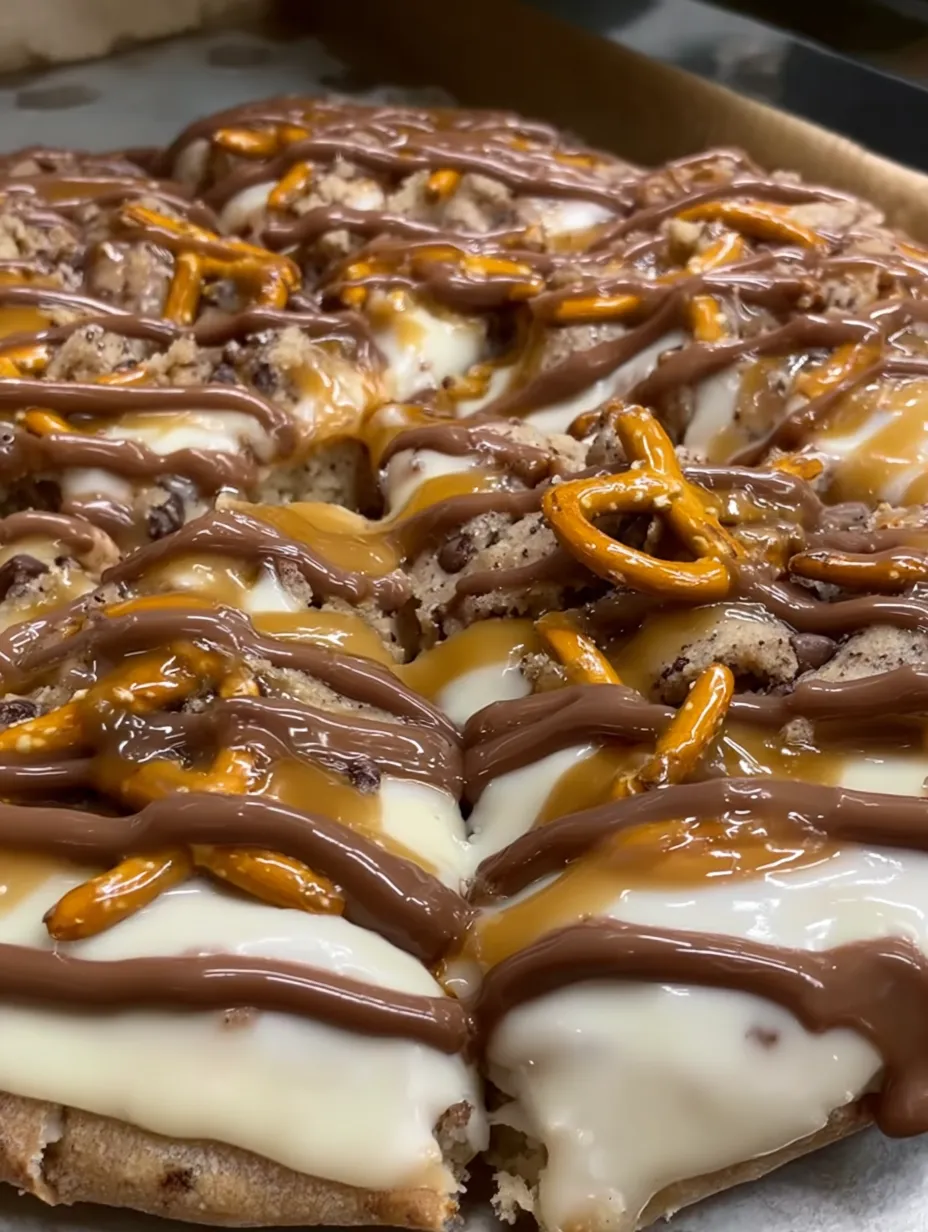
This dessert pizza features a golden, chewy crust filled with creamy cookie dough, creating a delightful contrast of textures. The base is topped with a rich vanilla glaze, a crown of crunchy salted pretzels, and luxuriously drizzled with melted chocolate and salted caramel. Serve this warm for melty bites or at room temperature for a deliciously sweet treat that balances salty, sweet, and chocolatey notes perfectly. Ideal for gatherings or satisfying late-night cravings, it’s a playful fusion of classic pizza and beloved treat flavors.

Cookie Dough Stuffed Crust Pizza is the ultimate mashup for anyone who dreams of dessert for dinner. Imagine buttery pockets of cookie dough baked into fluffy crust, a soft layer of vanilla glaze, and then a chaotic crown of salty pretzels and luscious drizzles of chocolate and caramel. It is everything I used to crave as a kid, and honestly my friends still ask for it whenever I host a movie night.
I always noticed that dessert pizzas were a hit at our local pizzeria, but nothing hits quite like cutting into a gooey slice with a surprise cookie dough center. People cannot believe how well the flavors go together.
Ingredients
- Large pizza dough: I recommend a dough with some chew to stand up to the sweet fillings and you can use store-bought or homemade
- Edible cookie dough: Choose a dough made for eating raw with heat-treated flour and no eggs This is the magic inside the crust and you can use classic chocolate chip or your favorite flavor
- Shredded mozzarella cheese (optional for sealing the crust): I know it sounds odd but mozzarella helps glue everything shut and since it is mild it does not overpower the dessert vibes
- Vanilla glaze or cream cheese icing: This is what makes the pizza luscious and sweet Look for something spreadable not too runny
- Salted pretzels: Either whole if you want big crunch or crushed for more uniform coverage The salt balances the sweetness perfectly
- Chocolate sauce: Melted chocolate or Nutella both work Warm to drizzle
- Salted caramel sauce: Look for a caramel sauce with a little salt or make your own at home
Step-by-Step Instructions
- Prepare the Pan and Oven:
- Start by preheating your oven to 190 degrees Celsius or 375 degrees Fahrenheit Get a pizza pan or rimmed baking tray ready and dust lightly with flour so the dough does not stick
- Roll and Stuff the Dough:
- Roll your pizza dough out into a large circle or rectangle aimed for about one centimeter thickness Lay it out on the prepared pan Distribute scoops of edible cookie dough evenly around the outer edge Then fold the dough over the cookie dough border pressing tightly so no filling escapes if needed run a finger of water around the inside edge to help it seal Sprinkle some shredded mozzarella over the seam and press again if using
- Bake the Crust:
- Pop the stuffed crust pizza in the oven and bake for 12 to 15 minutes The goal is for the crust to look just barely golden and puffed Your kitchen will start to smell like a cookie bakery as the dough bakes and some melted chocolate wafts out
- Finish with Toppings:
- Immediately after removing from oven transfer to a wire rack if possible and spread a thick layer of vanilla glaze or cream cheese icing right to the crust edges Scatter salted pretzels generously across the entire pizza Get in there with your hands for extra impact
- Drizzle with Chocolate and Caramel:
- Warm your chocolate sauce or Nutella until pourable Drizzle wildly over the top This is where you can make pretty zigzags if you wish Follow with salted caramel sauce letting some pool into the pretzel nooks
- Slice and Serve:
- Let the pizza set up for five minutes so the glazes do not run everywhere Slice into wedges and serve either warm gooey or at room temperature for a firmer bite Best eaten fresh but leftovers will be coveted
 Save
SaveI love the way salted pretzels snap and crunch against the soft cookie center. Once my little nephew broke apart his slice just to mine out the stuffed crust and now he insists every pizza should come with a cookie core.
Storage Tips
This pizza will keep covered at room temperature for up to one day but any longer and the crust may get soggy Pop leftovers in the fridge covered with foil and eat within two days The cookie dough will firm up as it chills so take it out 15 minutes before serving for soft texture again
Ingredient Substitutions
If you want a nut-free version use a sunflower seed based cookie dough and skip Nutella in the drizzle Vegan options include swapping in a plant based pizza dough plus coconut based icing and vegan chocolate sauce for drizzling Gluten free doughs and edible cookie doughs are widely available too
 Save
SaveServing Suggestions
Best cut into small wedges and served family style You can go all out and serve alongside bowls of extra caramel sauce or a scoop of ice cream on each plate For a show stopper finish sprinkle with festive colored sprinkles or edible glitter before serving
Cultural and Recipe Context
Dessert pizzas have been an American treat since the nineties usually offered at big pizza chains as a novelty. This homemade version brings the nostalgia factor with an extra cozy twist. In my house kid and adult alike race for the slice with the thickest cookie dough pocket.
Recipe FAQs
- → How do I keep the stuffed crust from leaking?
- Seal the edges tightly after folding the dough over the cookie dough. Pinch firmly and press to prevent any filling from escaping while baking.
- → Can I use store-bought cookie dough for the crust?
- Yes, most edible cookie dough blends work well. Ensure it’s safe for raw consumption, and avoid doughs with raw eggs or flour.
- → What other toppings pair well with this dessert pizza?
- Try adding mini marshmallows, chopped nuts, or white chocolate chips for extra texture and flavor. Fresh fruit like strawberries can add brightness.
- → How should I serve dessert pizza for best taste?
- Serve warm for a gooey crust or at room temperature for chewy texture. Slice with a sharp knife for clean pieces.
- → How do I store leftovers?
- Store in an airtight container at room temperature for up to one day or refrigerate for up to three days. Warm briefly before serving for best texture.
- → Can the crust be made ahead of time?
- Yes, prepare and bake the crust ahead. Add toppings just before serving to maintain the best texture and appearance.
Cookie Dough Stuffed Crust Pizza
Soft vanilla glaze and caramel pretzels top a chewy pizza with a cookie dough filled crust.
15 min
15 min
30 min
Ingredients
→ Stuffed Crust
→ Toppings
Steps
Preheat oven to 190°C (375°F).
Roll out the pizza dough onto a baking tray or pizza pan.
Spoon cookie dough evenly around the edge of the dough. Fold the dough over the cookie dough and seal tightly to form a stuffed crust.
Bake the crust for 12–15 minutes until lightly golden.
Remove from oven and spread vanilla glaze evenly over the pizza base.
Scatter salted pretzels over the top.
Drizzle chocolate sauce generously across the pizza.
Finish with a drizzle of salted caramel sauce.
Slice and serve warm or at room temperature.
Tips
- Use edible cookie dough to ensure safety when consuming raw dough.
- This dessert pizza pairs well with a scoop of vanilla ice cream.
Required Tools
- Baking tray or pizza pan
- Oven
- Spatula or spoon
Allergy Information
Always check each ingredient for allergens, and consult a medical professional if unsure.
- Contains gluten from pizza dough.
- Contains dairy from cookie dough, glaze, and optional mozzarella.
- Contains nuts if using Nutella or nut-based caramel sauce.
Nutritional Information (per serving)
These details are shared for general guidance and don’t replace professional advice.
- Calories: 385
- Fats: 18 g
- Carbohydrates: 45 g
- Proteins: 5 g